How To Hire A Video Editor
Video editing is by far the part of this process that takes the absolute longest. Hiring a video editor should be the first thing you do before you dive into the YouTube world full-force.
Why?
Because the editing process typically takes several hours per video, especially when you’re new and don’t really know what you’re doing yet.
Instead of wasting all of these hours on your own, I highly recommend hiring a video editor instead. It will save you TONS of time and money in the long run.
But you don’t want just “any” video editor. You need to find someone who is good at what they do, and who also won’t cost you a fortune.
After hiring several different editors over the years, I’ve learned that American editors are extremely pricey and their rates can add up fast. Using the following resources, I was able to outsource my editing overseas for 1/5 the cost of an editor in the United States.
Now, for some videos (usually ones that require a higher production quality, will be included in a private course or offering, or require some understanding of video marketing automation), I will still stick with my American editors. But for most weekly YouTube videos, I have systematically outsourced everything and have literally saved tens of thousands of dollars following this system below:
Step 1 – Create An Account on This Overseas Job Board
I have been using OnlineJobs.ph now for some time to hire overseas contractors. I’ve hired VAs, editors, graphic designers, web designers, you name it… This is by far my absolute favorite place to find remote employees because the Philippines has some of the best, highest quality employees across the board.
They’re very eager to work, they communicate very well, the cost of living there is so low that you can even find people who will work for $5/hour, and their English skills are top notch. Editors in the Philippines typically only cost about $30-40 per video compared to American standard editing rates, which hover around $40-50 per hour.
As you can imagine, this adds up to massive savings for you over time. And if you’re investing in your YouTube channel, the reality is you’re in this for the long haul. All of those cash savings are going to quickly add up, not to mention the hours upon hours this is going to save you from editing your videos yourself!
Step 2 – Post Your Job Description
After you’ve set up your account, you need to post a job description for a video editor. Navigate to “Post A Job,” then enter something such as the following:
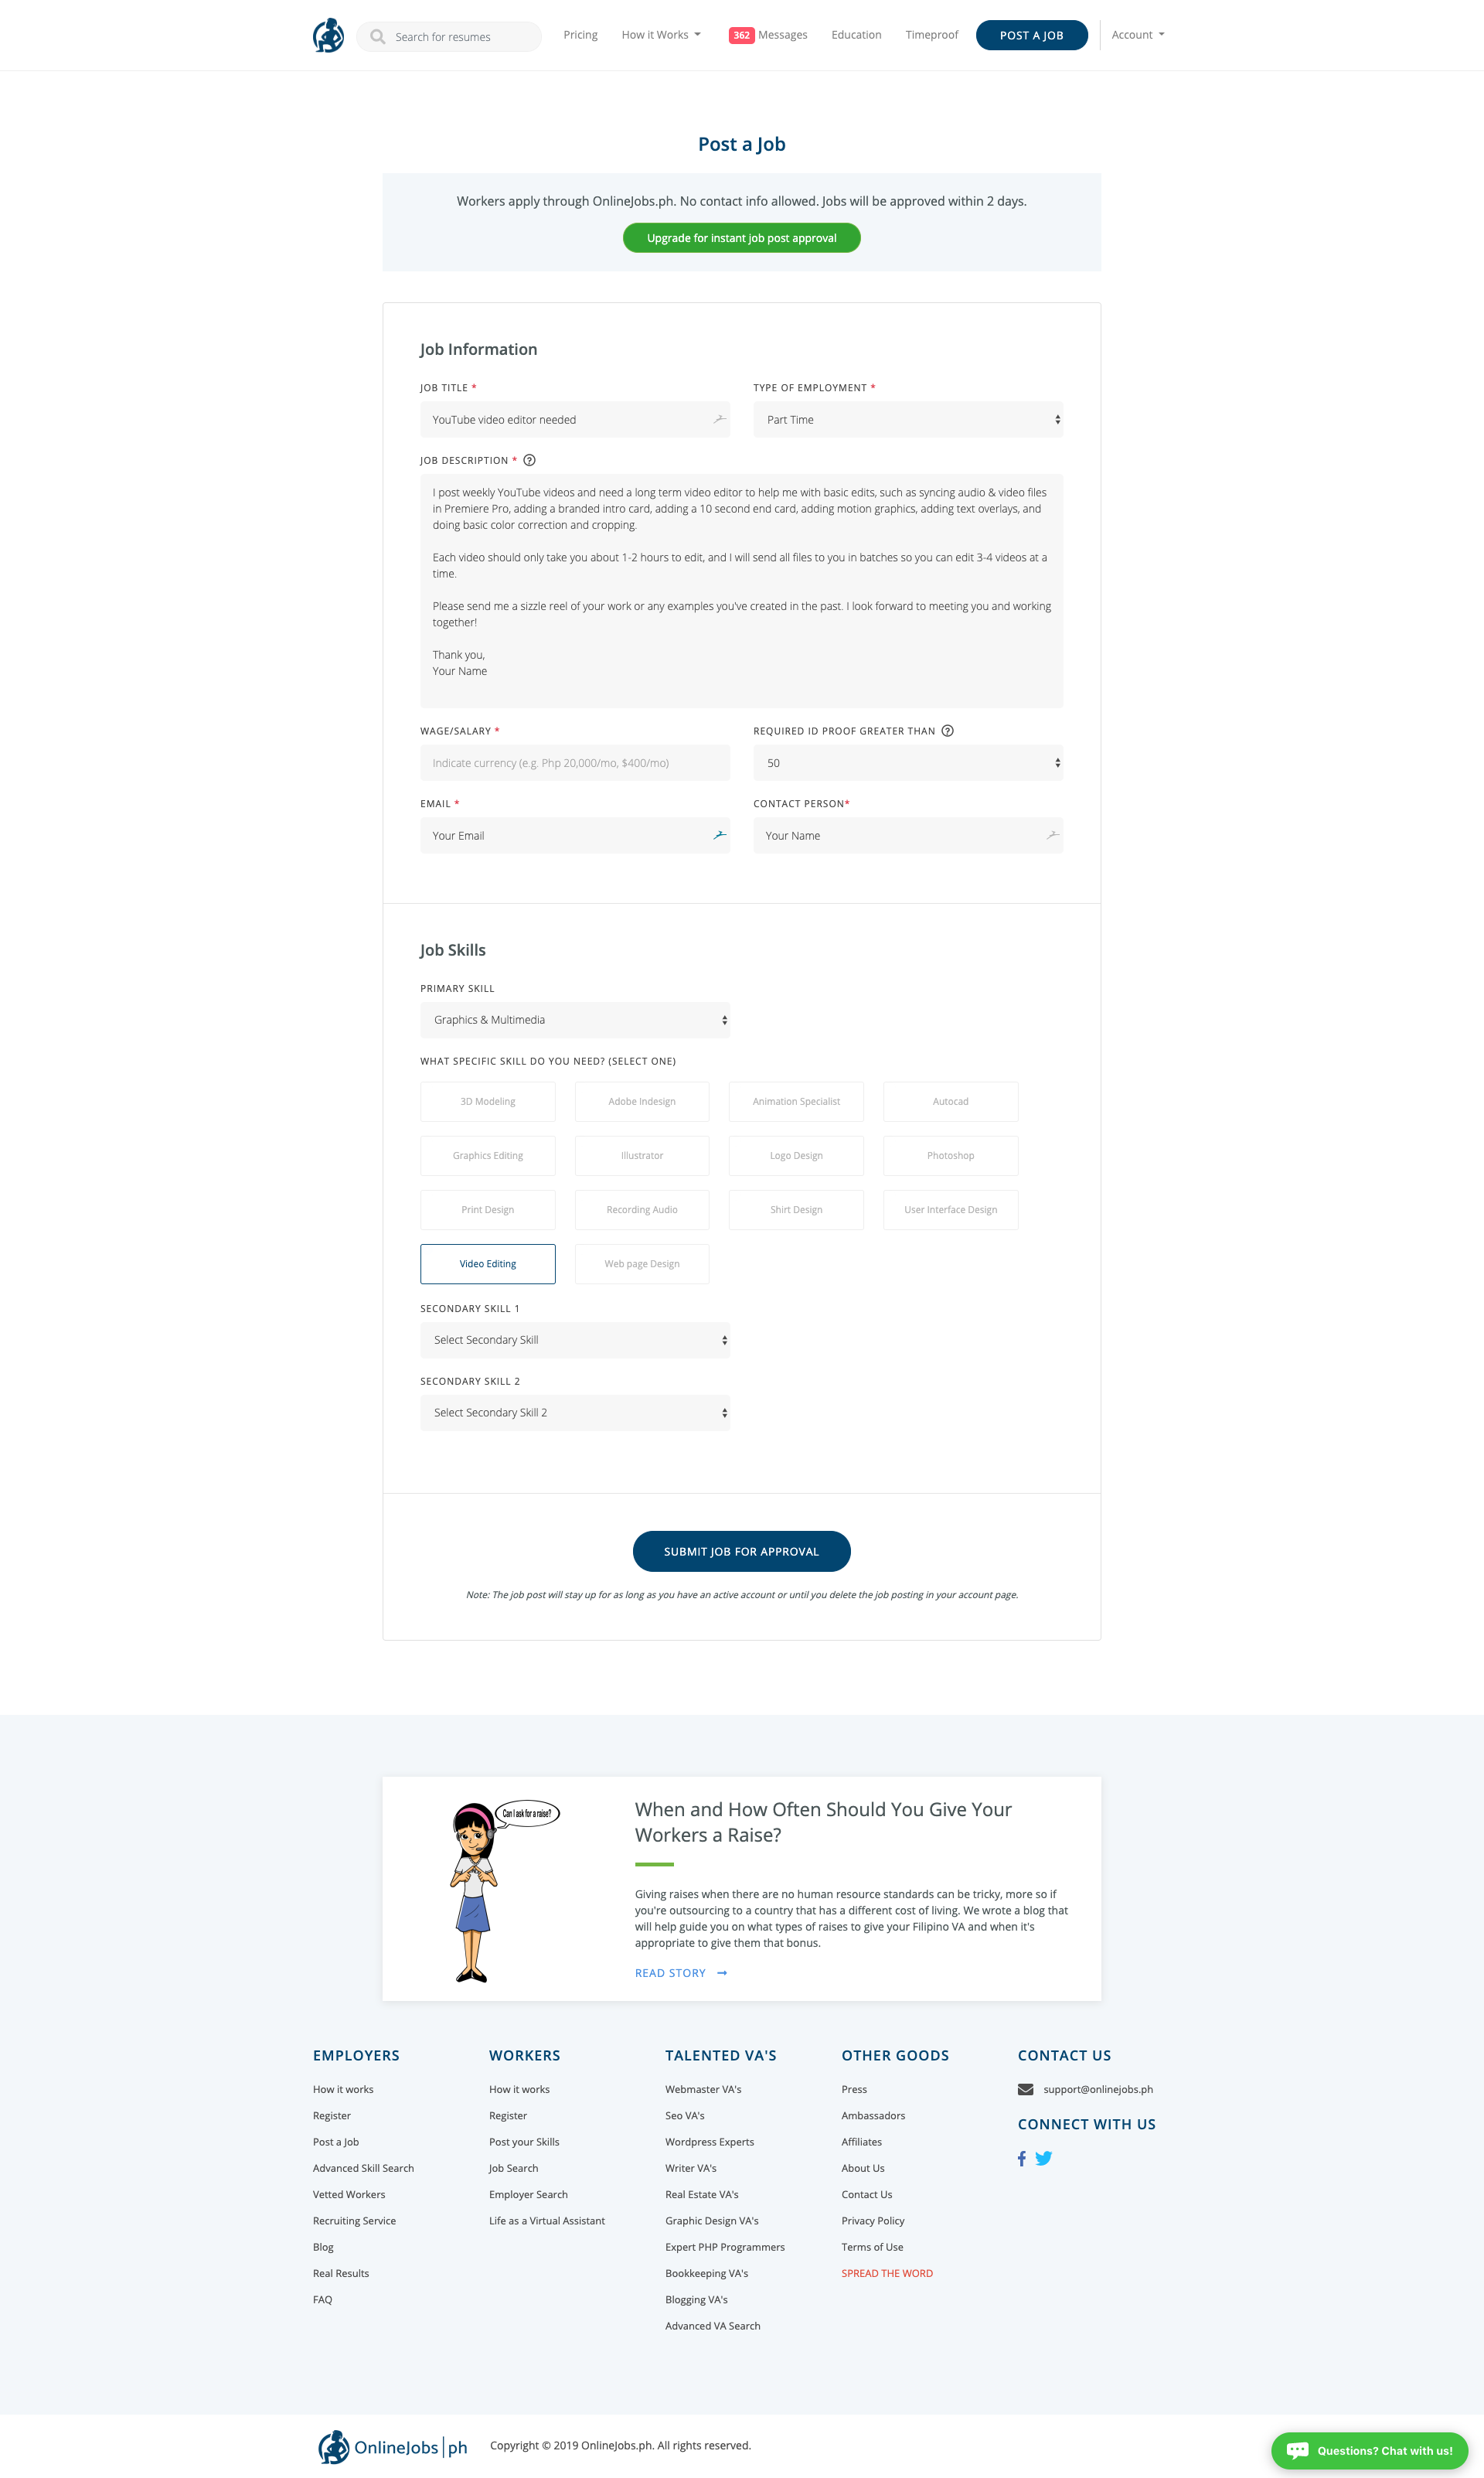
For the position wage/salary, this is up to you and your personal budget – but to give you a frame of reference I currently pay my editors around $120-160 USD per month to edit 4 videos at a time (this breaks down to $30-40 per video). Make sure you enter the currency you’re referencing so that job applicants can see the rates you’re offering accurately.
I also recommend adding which software you prefer they use in your job description. Adobe Premiere is the best (in my opinion), but some people also use Final Cut. Do not use “iMovie” as your necessary video editing software if you’re outsourcing this overseas because part of the reason you’re hiring an editor is to ensure you’re getting the best possible quality videos.
iMovie just doesn’t cut it, as it’s extremely limited in its motion graphics potential.
Once you’ve got your job description written, make sure in the ‘Primary Skill’ section you select “Graphics & Multimedia,” and specify that you’re looking for “Video Editing.”
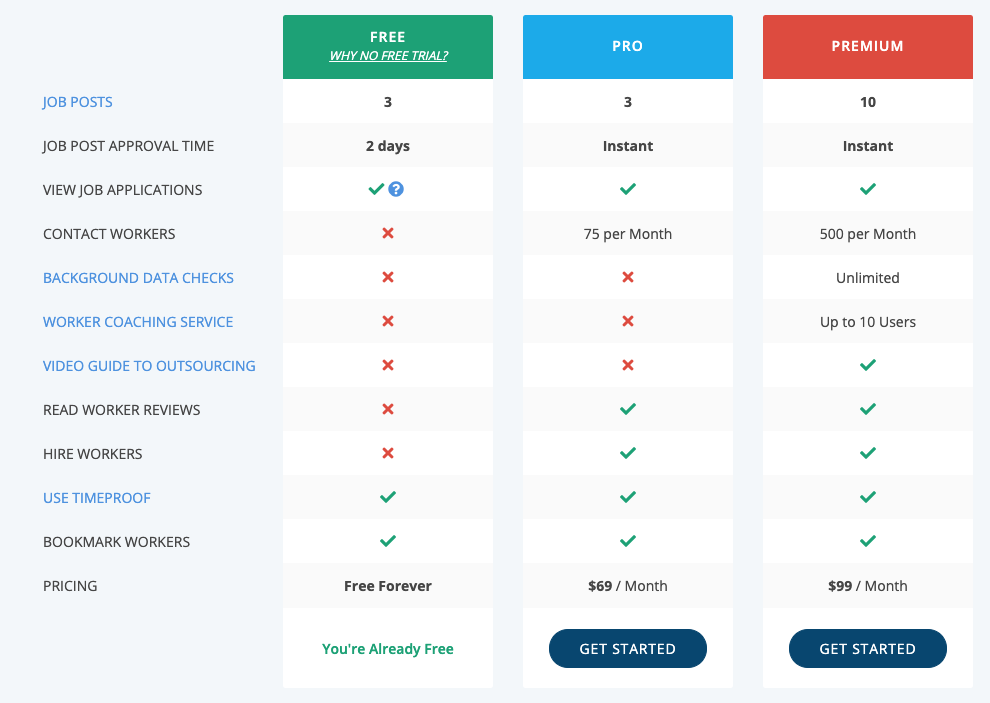
When you’re ready to post the job description, you’ll be prompted to set up a paid account so that you can communicate with each applicant. You must do this part to be able to hire, and this is pretty much standard operating procedure for any new employee hires.
In order to communicate with applicants, you’ll need to pay $69 per month. You can cancel your subscription after you’ve found your perfect editor, so this process should only cost you $69 overall.
I guarantee you will save that money in the first round of edits by using an overseas contractor, so DO NOT let this deter you from taking action.
Below are your pricing options. You only need the “Pro” account for this process.
Click the image below to set up your Pro account now.
Step 3 – Review Video Reels of Each Applicant’s Work
Once you have your Pro account set up and your job posting is live, you’re going to receive a lot of messages from prospective employees. The most important thing to do is make sure they read and followed your job description requirements, which includes sending you a sample of their best work.
Find a style that aligns with your brand, and narrow the applicants down to your top 2-3 people.
Step 4 – Choose Your Top 2-3 Favorites and Do A Test Run
Once you’ve identified your top 2-3 people, from there you should message them to do a “test run” of sorts. This is best to do once you have some basic footage for them to clip together.
I highly recommend uploading your audio and video files to Dropbox in an organized way so that they can return the edited files to you in a fast and efficient way. You can also add in any logos, brand assets, or other “mogrt” (motion graphics template) files you already have so they can add those in to spruce up the final videos.
Keep all your files organized and named the same thing, and request they do basic cropping, audio/video syncing, color correction and motion graphics. If you like the work they return, you’re almost ready to hire!
Step 5 – Reward the Job to the Person Who Fits Most
Once you’ve had a chance to “test out” your favorites, you’ll typically discover that you just resonate more with one particular person and their editing / communication style than the others. At this point, you’ll need to negotiate your ongoing rate before you reward the job.
Again, I recommend aiming for rates around $30-50 per video, not per hour. Each video should take them about 1-3 hours to edit, so you’ll be saving a lot over time and they’re able to make great money in their region working from home. It’s really a win-win!
Once you’ve negotiated a rate that the editor agrees to, the last step is to reward the job to them and on-board them into your organization. I personally use Slack to communicate with all of my team members as it’s a great way to keep everything in one place.
Regardless of what your current on-boarding process is, I highly recommend having your top pick editor sign an NDA agreement and a basic contract for the employment agreement. If you don’t already have a basic contract agreement, I highly recommend using the “Independent Contractor Contract Template” you can find on this page.
This process is literally so simple, yet so few people do it!
Save yourself the headache of doing your own editing. Trust me on this one!! You will be way ahead of the pack if you do this immediately.
Having done video marketing and YouTube now for years, this is always the FIRST STEP I implement before I do anything else. It’s extremely important. You can thank me later 😉